
simple 5-steps how to ai rig a model for vtubing? Get to know how to use AI to rig 2D or 3D models to use as a VTuber with software such as Live2D, VTube Studio, VRoid, Mixamo and DeepMotion.
Brief summary (what goes by the name AI-rigging)
Standard tools of AI rigging in VTubing are normally automated or AI-assisted tools to:
- variety of skeleton/skeletal weights to a 3D mesh can be generated/auto-rigged ( Mixamo, VRoid workflows ), or
- speed up 2D puppet rigging (Live2D + helper scripts/tutorials), or
- to generate video or webcam animations (AI mocap — DeepMotion / Animate 3D), or
- perform facial tracking / lip-syncing automatic in real time (applications such as VTube Studio with use of phone/web camera).
Toolset(s) Recommended (up-to-date, well supported)
- 2D (Live2D pipeline): Photoshop/Clip Studio (Adobe)/Live2D Cubism (rig and export Moc3) Live2D Cubism VTube Studio / OBS. Live2D is the standard of 2D VTuber rigs in the industry.
- Bridge Studio (create anime humanoid) – VRoid Studio 3D (quick start) → Mixamo (auto-rig / animations) or the blender (refine) – VSeeFace / Luppet / Unity exporter streaming.
- Body movement: DeepMotion Animate 3D (vid starting to 3D animation) AI-assisted body movement, smartphone inertial motion / AR tracking (live). Good in cases where you would desire full body animation but no suits.
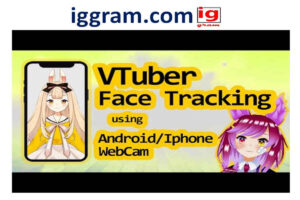
- Face tracking: Webcam / smartphone face tracking (iphone faceID is higher quality) + VTube Studio (stream face tracking).
Live2D route 2D (fast, common) 2D route, step-by-step.
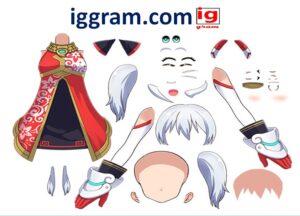
- In layers design art- different parts of the body, such as eyes, pupils, eyelids, mouth shapes, hair pieces, neck, body parts. Use PSD with named layers. Layering that is required is documented in (Live2D docs).
- Export to Live2D Cubism — make ArtMeshes with layers, pivot layers. Smooth bends should be stripped using deformers. Formal instructions are superb.
- Parameters- physics Create parameters and physics head tilt eye blink mouth open/visemes hair physics. Hair/clothes Use parameter interpolation and physics.
- Auto helpers/tutorials – lots of video tutorial series and community rigs to be adapted; they speed up the routine rigs.
- Export .moc3 + textures and load .moc3 and then load to VTube Studio (or other engines) to use it in a live face tracking game on live streaming application. VTube Studio is a live-action that welcomes Live2D models directly and has webcam/phone tracking.
Trip: 3D quick route (with the least time)
- Design base avatars- VRoid Studio to make an Asian humanoid fast with no modelling skills (anime).
- Auto-rig using Mixamo – Export FBX/OBJ out of your tool and auto-rig and library of animations in Mixamo. A skeleton will be allocated automatically by Mixamo.
- Refine in Blender/Unity — adjust weights, add blendshapes (for facial expressions) or import into Unity if using a Unity-based driver (VSeeFace, Unity VRM workflows).
- AI mocap / animations- DeepMotion Animate 3D (including 3D animation) should be used to turn the recorded video into 3D animation clips (good use: choreography and gestures). Is capable of being applied to your Mixamo/VRoid rig.
- Streaming applications- VSeeFace, Luppet, etc. can be used to connect your webcam/mobile tracking with your model and stream output to OBS, which can then be streamed/recorded.
Live face recognition and lip reading.
- VTube Studio: webcam or phone (FaceID/ARCore) to have a high-quality facial capture (2D Live2D models). Works well for live streams.
- DeepMotion (real-time beta / Animate 3D): ideal in converting recorded video into animation and adding more and more real-time pipelines.
- Phone AR tracking: iPhone with Face ID can usually provide the most smooth experience of real-time facial capture to most VTubers.
continuous velocity profile Examples exponentially decaying pipelines (choose one)
- Fast 2D: PSD (live2D cubism) -> VTube Studio (iPhone face tracking) -> OBS (iphone face tracking).
- Fast 3D newcomer: VRoid Studio to Mixamo auto-rig to DeepMotion to add extra animations VSeeFace / OBS.
Tips, gotchas & best practices.
- Design to be rigged: (L/R pupil, upper/lower eyelid, individual hair pieces, etc.). Saves hours later.
- Begin with the models that are free to learn: there are numerous free Live2D/VRoid models; learn to use them and then create something before creating personal art.
- Always remember realtime performance: fewer polys (3D) and smaller textures (2D) are executed more successfully with mediocre machines.
- Check licenses: in case so: use of AI tools or purchase of assets confirm commercial/streaming.
- backup often: it is easy to lose files and folders with rigging in them (Live2D .moc3, Blender .blend) — save a shadow.
You can (choose any and I will do it now) if you want.
- The dollar short checklist that caters to your OS/hardware, or
- a step-by-step Live2D rig checklist of one of your character PSAs that you submit, or
- a three-dimensional pipeline that consists of precise export options to VRoid Mixamo Blender VSeeFace.
Part 1, 2D VTuber (Live2D and VTube Studio).
Tools You’ll Need
- Art –tool: Photoshop or Clip Studio Paint (PSD layered artwork)
- Software: Rigging software Live2D Cubism Editor (free or professional)
- Video streaming software: VTube Studio.
- Optional: iPhone (with Face ID tracking of faces) or webcam.
Step-by-Step Workflow
- Prepare the PSD
- It should also have a separate layer per movable part:
a)Eyes (L/R, upper/lower lids, pupils)
b)Mouth (open/close, smile/frown)
c)Head (front hair, back hair)
d)Body, neck, arms, clothes, accessories.
- Name the same things (e.g. EyeLopen, EyeRblink).
- Combine only lifeless stuff (such as background sections).
- Import to Live2D Cubism
- Open Cubism It is possible to open it by clicking File New Model Import PSD.
- ArtMeshes of each layer are automatically made by the app.
- comprising face: More detailed Face parts; thickness of basic body parts.
- Create Parameters
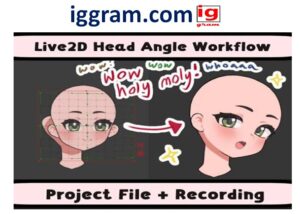
- The angle of the head: Angle X, Angle Y, Angela Z.
- Memory Analysis: Eye Open, Eye Smile, Eye Blink.
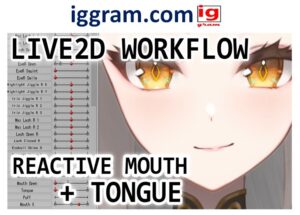
- Mouth Mouth Open Y, Form (shape)
- Body: Body Angle X/Y, Breath, Movement of Hair.
- parameter testing in Cubism.
- Add Deformers & Physics
- Warp deformers should be used when bending soft hair (hair, cheeks).
- Physics settings & Scene settings: jiggle/hair motion can be added, on the Physics and Scene Settings.
- Export the Model
- export Run time →ontac moc3 file.
- It will create.moc3, .model3.json and a textures folder.
- Load into VTube Studio
- Drag the.model3.json to the VTube Studio/models folder.
- VTube Studio Opened up → Add Model → Select your file.
- Facial tracking is possible: Webcam or iPhone app (connect to Wi-Fi).
- Expressions calibrating, hotkeys of the emotes.
3D VTuber (VRoid + Mixamo + VSeeFace) PART 2.
Tools You’ll Need
- Character designer: VRoid Studio.
- Auto-rigging tool: Mixamo
- Editing software: Blender
- Streaming app: VSeeFace
- Optional: DeepMotion Animate 3D (AI motion capture of video) is optional.
Step-by-Step Workflow
- Create or import your model
- In VRoid Studio: dress your anime character.
- Export as .vrm or .fbx.
- Auto-rig with Mixamo
- Send mixed to Mixamo – tick chin, wrists, elbows, knees, groin.
- Auto-rig it out→ download the rigged fbx.
- Animations (idle, dance and so on) can be also tried.
- Refine in Blender
- Import the rigged .fbx.
- Paint adjustment in case of any deformation appears.
- Add shape keys for expressions (smile, blink, mouth open).
- Export as .vrm using a Unity plugin or VRM exporter add-on.
- Load into VSeeFace
- Put your.vrm file in the VSeeFace Avatars folder.
- open VSeeFace→ Choose your model. →Tracking (webcam) on.
- Turbocharge motion sensitivity and blendshape mappings.
- (Optional) Add AI Motion
- Use the DeepMotion Animate 3D to post a video of yourself in motion.
- Export the resulting animation as.fbx or.bvh and use on your model in Blender as pre-recorded content or animation sequences.
Pro Tips
- Use PSD size not larger than 4096X4096 to use in Live2D.
- In VRoid, polygon count should not exceed 50k to run in real-time.
- Make an initial test of the lighting and the background setup of both models in OBS.
conclusion:
AI-based rigging will also speed up, simplify, and make VTubing much more accessible than it was previously.
Live2D to make expressive 2D models and VRoid/Mixamo to make full 3D avatars can create two versions of a VTuber that fit various types of streaming.
- 2D route – Ideal when chatting in close, emotional and lightweight streaming.
- 3D route- it is ideal in games, dancing, or full body movement with AI motion-tracking.
Complicated rigging and animation are automated using AI software such as Mixamo and DeepMotion, whereas software such as Live2D Cubism, VTube Studio, and VSeeFace takes care of the real-time tracking and performance aspect.
Also read- Trusted 2 Simple term What is AI? and What does AI stand for?

2 thoughts on “simple 5-steps how to ai rig a model for vtubing?”